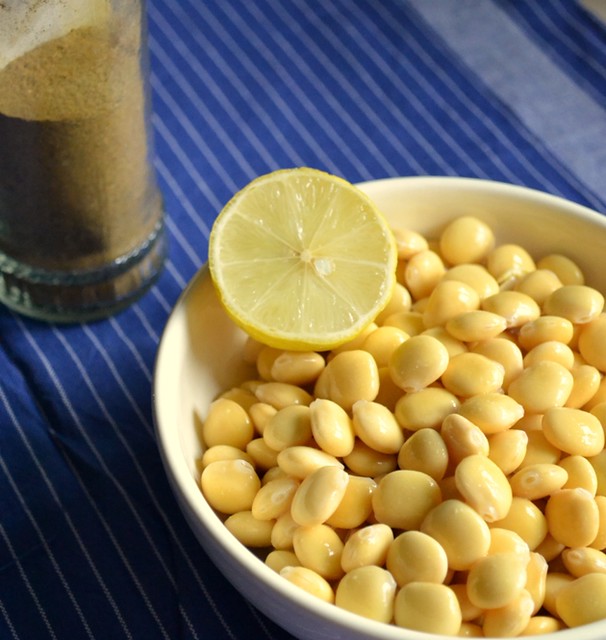
Egyptian Termis, or Lupini Beans, are a beloved snack in Egypt and across the Mediterranean. These beans are not only delicious but also highly nutritious, making them a perfect addition to a healthy diet. The preparation process requires some patience, but the result is well worth the effort. Whether enjoyed plain or with a sprinkle of spices, Egyptian Termis are a delightful and wholesome treat.
Health Benefits of Egyptian Termis (Lupini Beans)
This traditional recipe is packed with numerous health benefits:
- Lupini Beans: High in protein and fiber, lupini beans are a great plant-based protein source. They are low in fat and rich in essential nutrients like magnesium, potassium, and vitamins B and C.
- Salt: While moderation is key, salt in this recipe helps with the detoxification process, reducing the bitterness of the beans. It also adds to the flavor profile, making the beans more enjoyable.
Preparing lupini beans at home ensures you control the amount of salt and avoid unnecessary additives, making this a healthy and natural snack.
How to Make Egyptian Termis (Lupini Beans)
To make this delicious and nutritious snack, follow these steps:
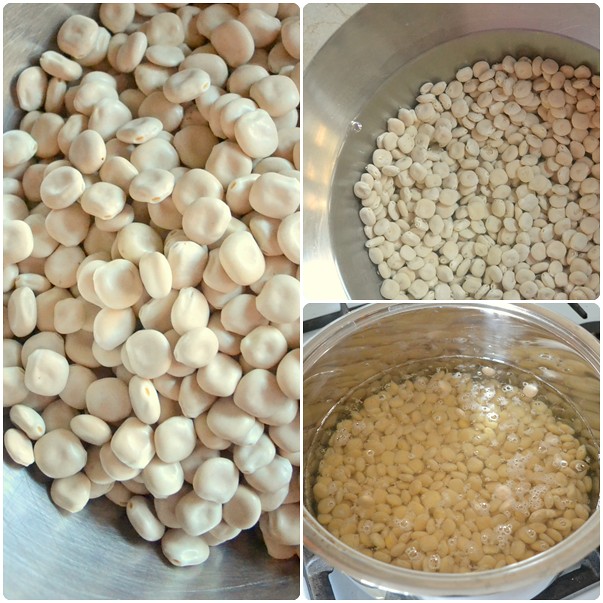
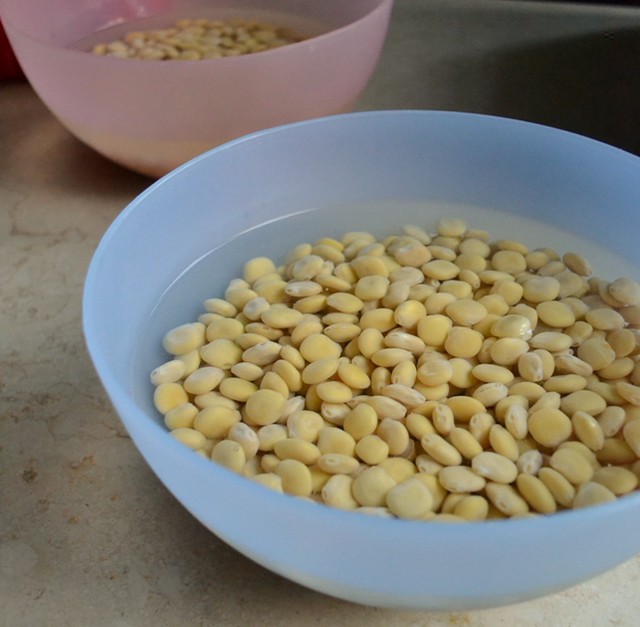
- Soak the Beans: Soak the lupini beans in water for 24 hours. Make sure the beans are well covered as they will swell during the soaking process.
- Boil the Beans: After soaking, boil the beans for around 30 minutes. This helps to soften the beans and remove some of their bitterness.
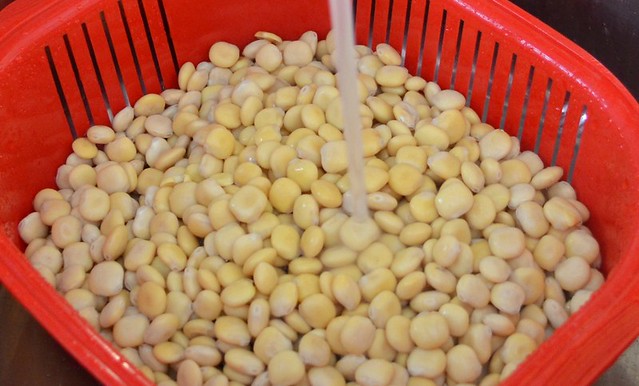
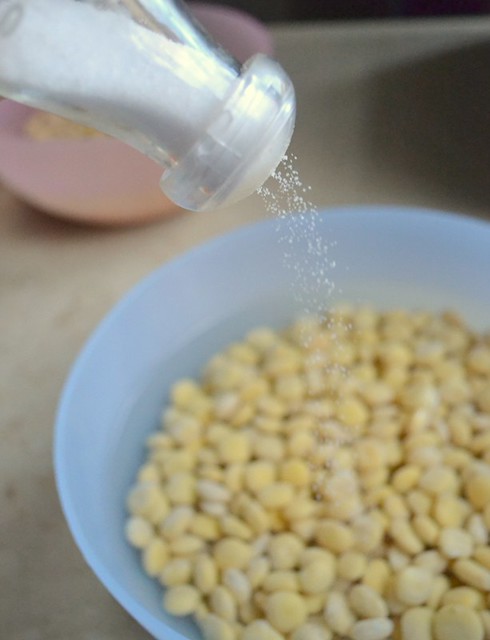
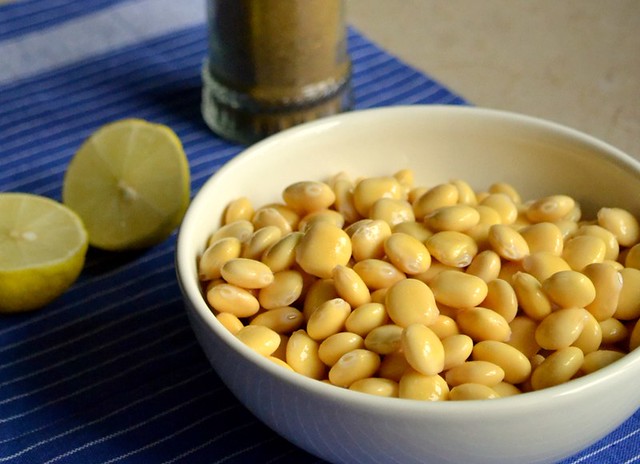
- Rinse and Salt the Beans: Rinse the beans under cold running water. Then, place them in fresh, well-salted water (similar to the salinity of pasta water) and leave them for around 4 hours. This step is crucial for eliminating the bitter taste.
- Taste and Adjust: Change the salted water and taste the beans. If any bitterness remains, repeat the process of changing the water until the bitterness is completely gone.
- Final Salt and Storage: Add more salt to taste and store the beans in the refrigerator for up to one week. Ensure the beans are always covered with water. If they taste too salty, simply rinse them and change the water, reducing the salt as needed.
Tips for Making the Best Egyptian Termis (Lupini Beans)
Here are some tips to ensure your Egyptian Termis turn out perfectly:
- Patience is Key: The soaking and rinsing process can take some time, but it is essential for achieving the best flavor and texture.
- Adjust the Salt: Taste the beans throughout the process and adjust the salt levels to your preference. You want the beans to be flavorful but not overly salty.
- Experiment with Spices: While traditional termis is enjoyed plain or with cumin, feel free to experiment with other spices like paprika, garlic powder, or chili flakes to add a unique twist.
- Proper Storage: Always keep the beans covered with water in the refrigerator. This keeps them fresh and prevents them from drying out.
How to Serve Egyptian Termis (Lupini Beans)
Egyptian Termis are a versatile snack that can be enjoyed in various ways and on different occasions:
- Snacking: Enjoy them as a healthy, protein-packed snack throughout the day. They are perfect for satisfying hunger between meals.
- Appetizers: Serve them as part of a mezze platter with other Mediterranean delights like hummus, olives, and pita bread.
- Picnics: Pack them for a picnic or outdoor gathering. They are easy to transport and can be enjoyed at room temperature.
- Party Snacks: Offer them at parties as a unique and nutritious alternative to chips and other typical party snacks.
- Garnish: Use them as a crunchy topping for salads or soups to add texture and a boost of protein.
Embracing Tradition with a Healthy Twist
Egyptian Termis, or Lupini Beans, bring a taste of traditional Mediterranean cuisine into your home with a healthy twist. This recipe honors the age-old methods of preparing lupini beans while emphasizing their nutritional benefits and versatility.
Making termis at home connects you to the cultural heritage of Mediterranean cooking, where simple ingredients and time-honored techniques create flavorful and nourishing dishes. This recipe exemplifies how traditional foods can be adapted to fit modern dietary preferences, promoting a balanced and nutritious diet.
Incorporating Egyptian Termis into your diet allows you to enjoy a delicious and wholesome snack that supports your health and wellness. This recipe celebrates the rich culinary history of the Mediterranean while making it accessible and enjoyable for contemporary lifestyles.

Egyptian Termis (aka Lupini Beans)
Course: Egyptian, Kid-friendly, Snacks, VeganDifficulty: Easy6-8
servings30
minutes20
minutes12-18 hours
50
minutesIngredients
1 pound or any quantity really dry lupini beans
Water
Salt
Cumin (optional)
Directions
- First, you’re going to need to soak the beans in water for 24 hours (make sure you cover the beans well because they’re going to swell up as they soak). After that you’re going to boil the beans for around 30 minutes.
- Rinse the beans under cold running water.
- Put them in fresh, well salted water (like you’re salting water for pasta- so not too much and not too little) and leave them for around 4 hours. This is to get rid of the beans’ bitter taste.
- Change the salted water again and taste. You want no trace of bitterness in the termis. If it still tastes a bit bitter, change the water one more time.
- Add more salt to taste and put it in the fridge for up to one week. Make sure all the termis is covered with water and if it tastes too salty simply rinse it off and change the water again decreasing the amount of salt.
- Loots of people like to add cumin to their termis to give it a kick. You could also think up of various other spices to add, I won’t stand in your way.