

I am not going to get into the whole dry ramen noodle conspiracy theory debate. But having been on the receiving end of around 147,000 forwarded articles from various dubious and not so dubious sources on how supermarket noodles are out to kill my family, I’ve decided to just go ahead and copycat them in our own (sans killer intentions) kitchen.
Ramen noodles have always been my go to pre-exam, sick-day, guilty breakfast food (my favorite are the ones that come with the tiny sachet of generic curry powder, yum!). Then when I had kids, they became my lazy-mom-oops-I-didn’t-make-dinner dinner, tossed with leftover chicken and some frozen broccoli so I didn’t feel too bad.
This recipe is super easy, quick AND the noodles can be frozen or dried for later. You will need a pasta machine though, just the really basic one. And some gloves to handle the baking soda after it’s baked (more on that in the recipe).
Ingredients:
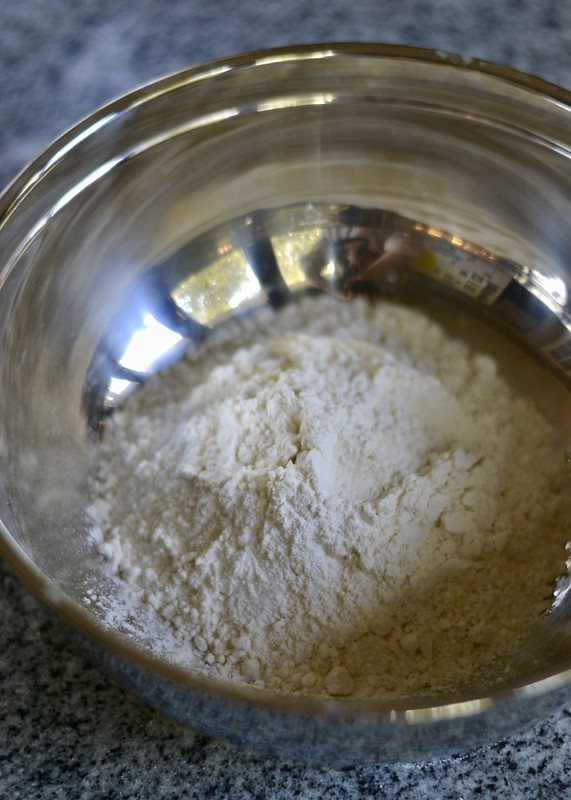
200 grams bread flour (high gluten)
2 grams salt
4 grams baked baking soda
80 grams water
Directions:
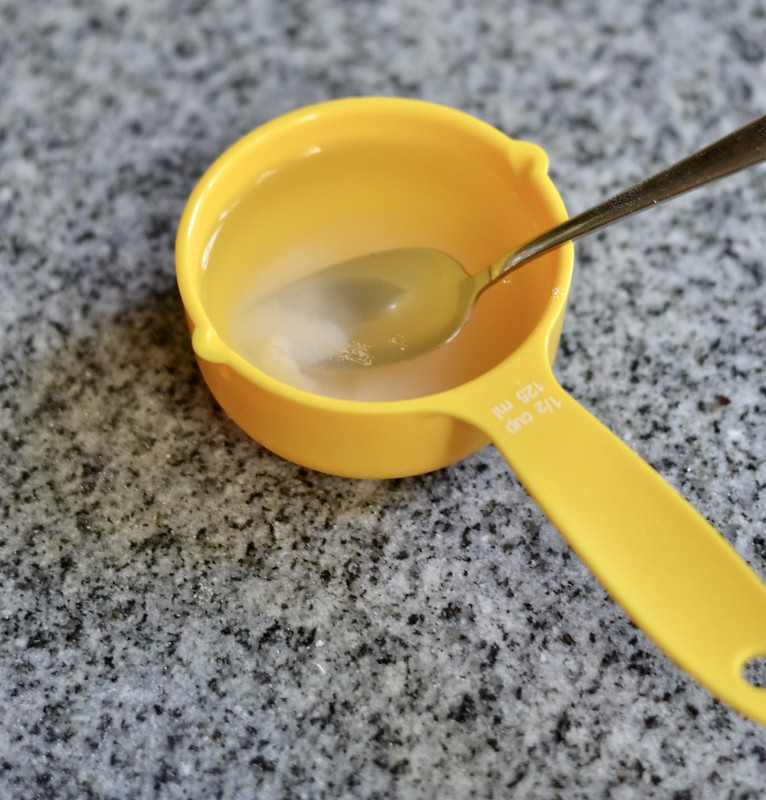
Spread one cup of baking soda on a parchment lined baking sheet and bake it for an hour at 140 c. When you take it out of the oven handle with gloves because its more concentrated alkalinity makes it more caustic and likely to irritate your skin. Store it in an airtight container as you’ll only need a small amount for this recipe.

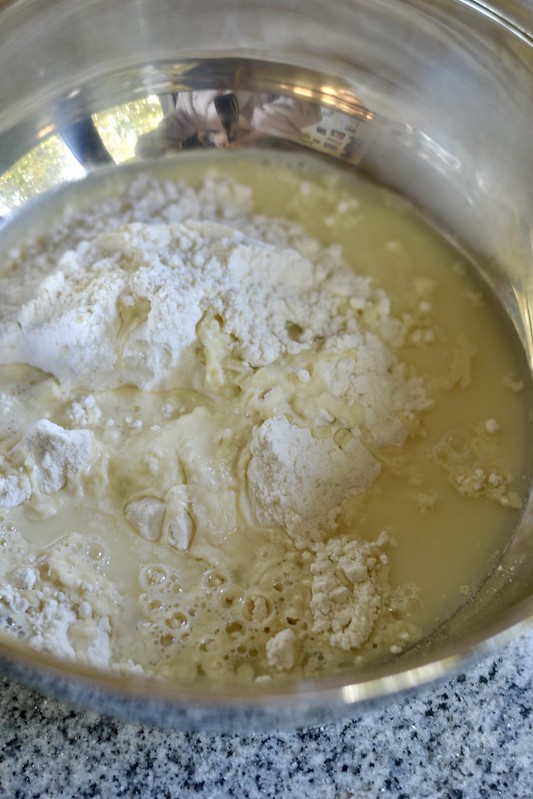
Dissolve baked baking soda and salt in water then mix with flour. The flour will turn yellow, that’s the baking soda turning it all ramen-y.
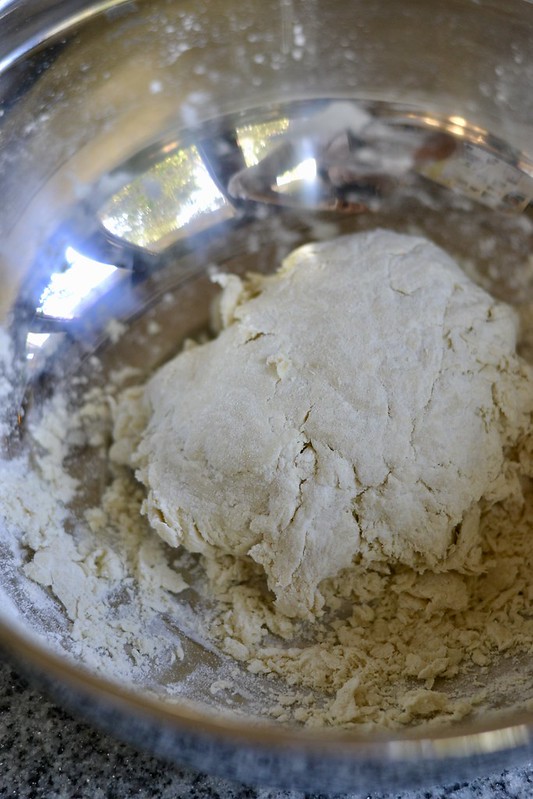
Knead hard, knead really hard. This is an unfriendly dough. It will feel dry and flaky but do NOT add a single extra drop of water. Wrap the kneaded ball of dough in plastic wrap and let it rest for 30 minutes to an hour.
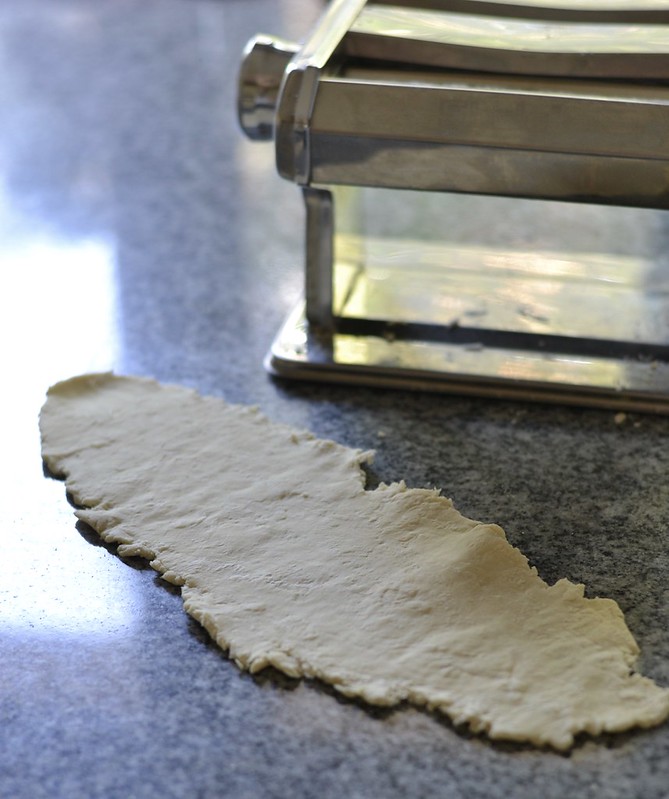
Form the dough into a thick disc and pass it through the pasta machine on the widest setting.

Keep running it through the narrower settings until it’s to your desired thickness (or thinness as the case may be).
Here comes the fun part.
Wait a minute and then pass the thin sheet of ramen dough through the spaghetti setting of the machine.
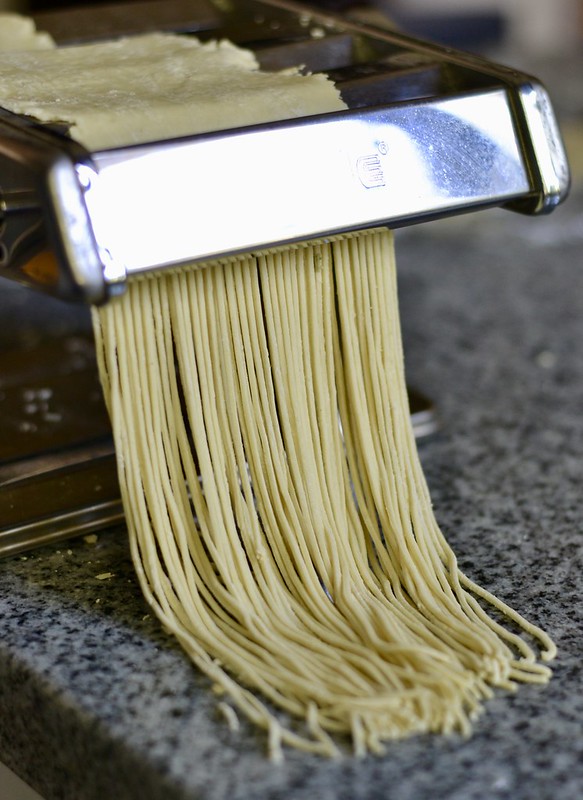
At this point you can keep them as they are or squish ’em with your fingers lightly to give them that zigzaggy, squiggly ramen shape we all love to slurp.

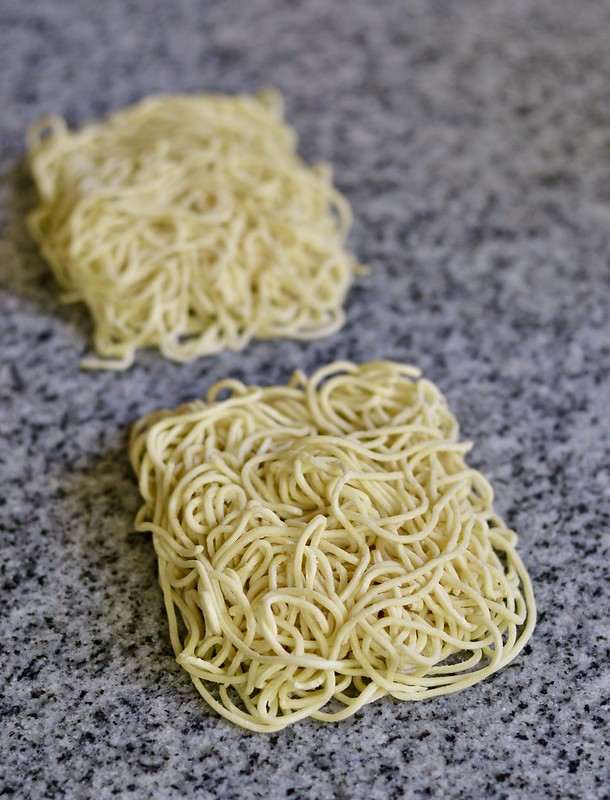
You can eat them right now (and I bet that’s what you will do with the first batch) or form into ‘nests’ and dry or freeze for a not-at-all guilty lunch later.
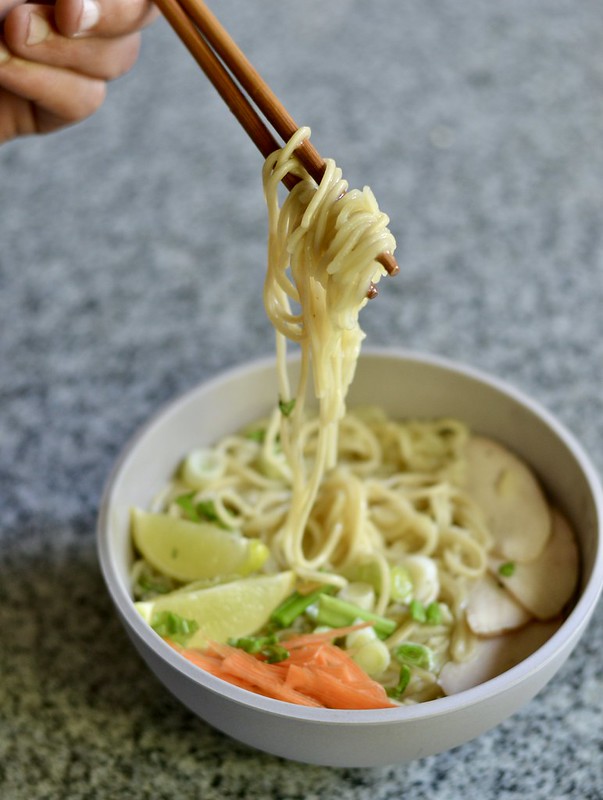
Boil in lightly salted water for a minute and a half, rinse, and then plop into hot, delicious broth and top with whatever your little heart desires.

Homemade Ramen Noodles

- 200 grams bread flour (high gluten)
- 2 grams salt
- 4 grams baked baking soda
- 80 grams water
-
Spread one cup of baking soda on a parchment lined baking sheet and bake it for an hour at 140 c. When you take it out of the oven handle with gloves because its more concentrated alkalinity makes it more caustic and likely to irritate your skin. Store it in an airtight container as you’ll only need a small amount for this recipe.
-
Dissolve baked baking soda and salt in water then mix with flour. The flour will turn yellow, that’s the baking soda turning it all ramen-y.
-
Knead hard, knead really hard. This is an unfriendly dough. It will feel dry and flaky but do NOT add a single extra drop of water. Wrap the kneaded ball of dough in plastic wrap and let it rest for 30 minutes to an hour.
-
Form the dough into a thick disc and pass it through the pasta machine on the widest setting.
-
Keep running it through the narrower settings until it’s to your desired thickness (or thinness as the case may be).
-
Here comes the fun part.
Wait a minute and then pass the thin sheet of ramen dough through the spaghetti setting of the machine.
-
At this point you can keep them as they are or squish ’em with your fingers lightly to give them that zigzaggy, squiggly ramen shape we all love to slurp.
-
You can eat them right now (and I bet that’s what you will do with the first batch) or form into ‘nests’ and dry or freeze for a not-at-all guilty lunch later.
Boil in lightly salted water for a minute and a half, rinse, and then plop into hot, delicious broth and top with whatever your little heart desires.


https://waterfallmagazine.com
Howdy! This is my first visit to your blog! We are a group of volunteers and starting
a new project in a community in the same niche. Your
blog provided us valuable information to work on. You
have done a wonderful job!
Thank you, I’m glad you found it useful:)